Web Server and GPIOs
Installation of Setuptools
In order to use packages that are not preinstalled in Python, such as the Twython package for Twitter or the WebOb package for the Webserver, we need first to install Setuptools. After installing Setuptools, we can download and then install the desired packages by using the install command. Please note that the procedure for installing Setuptools is different on Linux and window.
Installation of Setuptools on Linux (for Raspberry Pi and Ubuntu):
1. Download ez setup.py and save it on the Desktop.
2. Open the terminal and “go to the Desktop directory”, that is, use the cd command to change the directory to …/Desktop.
3. In the terminal type:
sudo python3 setup.py install
To know more:
If you want to know more about software packages available for Python look at the page https://pypi.python.org/pypi.
Web Server
Before running the programs of this section we need to install the WebOb package. Make sure Setuptools is installed before trying to install WebOb.
Installation of the WebOb Package on Linux (for Raspberry Pi and Ubuntu)
1. Go to the WebOb package page and download the latest version to the Desktop (you need to click on the green button to start the download). Expand the archive. After expanding the archive you should have on the desktop the folder WebOb-1.7.4
2. Open the terminal and “go to the WebOb-1.7.4 directory”, that is, use the cd command to change the directory to …/Desktop/WebOb-1.7.4
3. In the terminal type:
sudo python3 setup.py install
Example 1
Try the following program (file Example 1).

Run the program and find the ip address of the computer on which the program is running. In the browser of another computer connected to the same network type:
http://ip address:8080
If you are testing the program using the browser on the same computer in which the program runs, you can write:
http://localhost:8080
Example 2
The following program (file Example 2) shows how to easily include inside a python program proper html code spanning several lines. In order to create a string that spans several lines just use the triple quote “”” as shown in this program.

Example 3
Try the following program (file Example 3):

Example 4
Try the following program (file Example 4):

Example 4.1
Make the following connections (see picture):
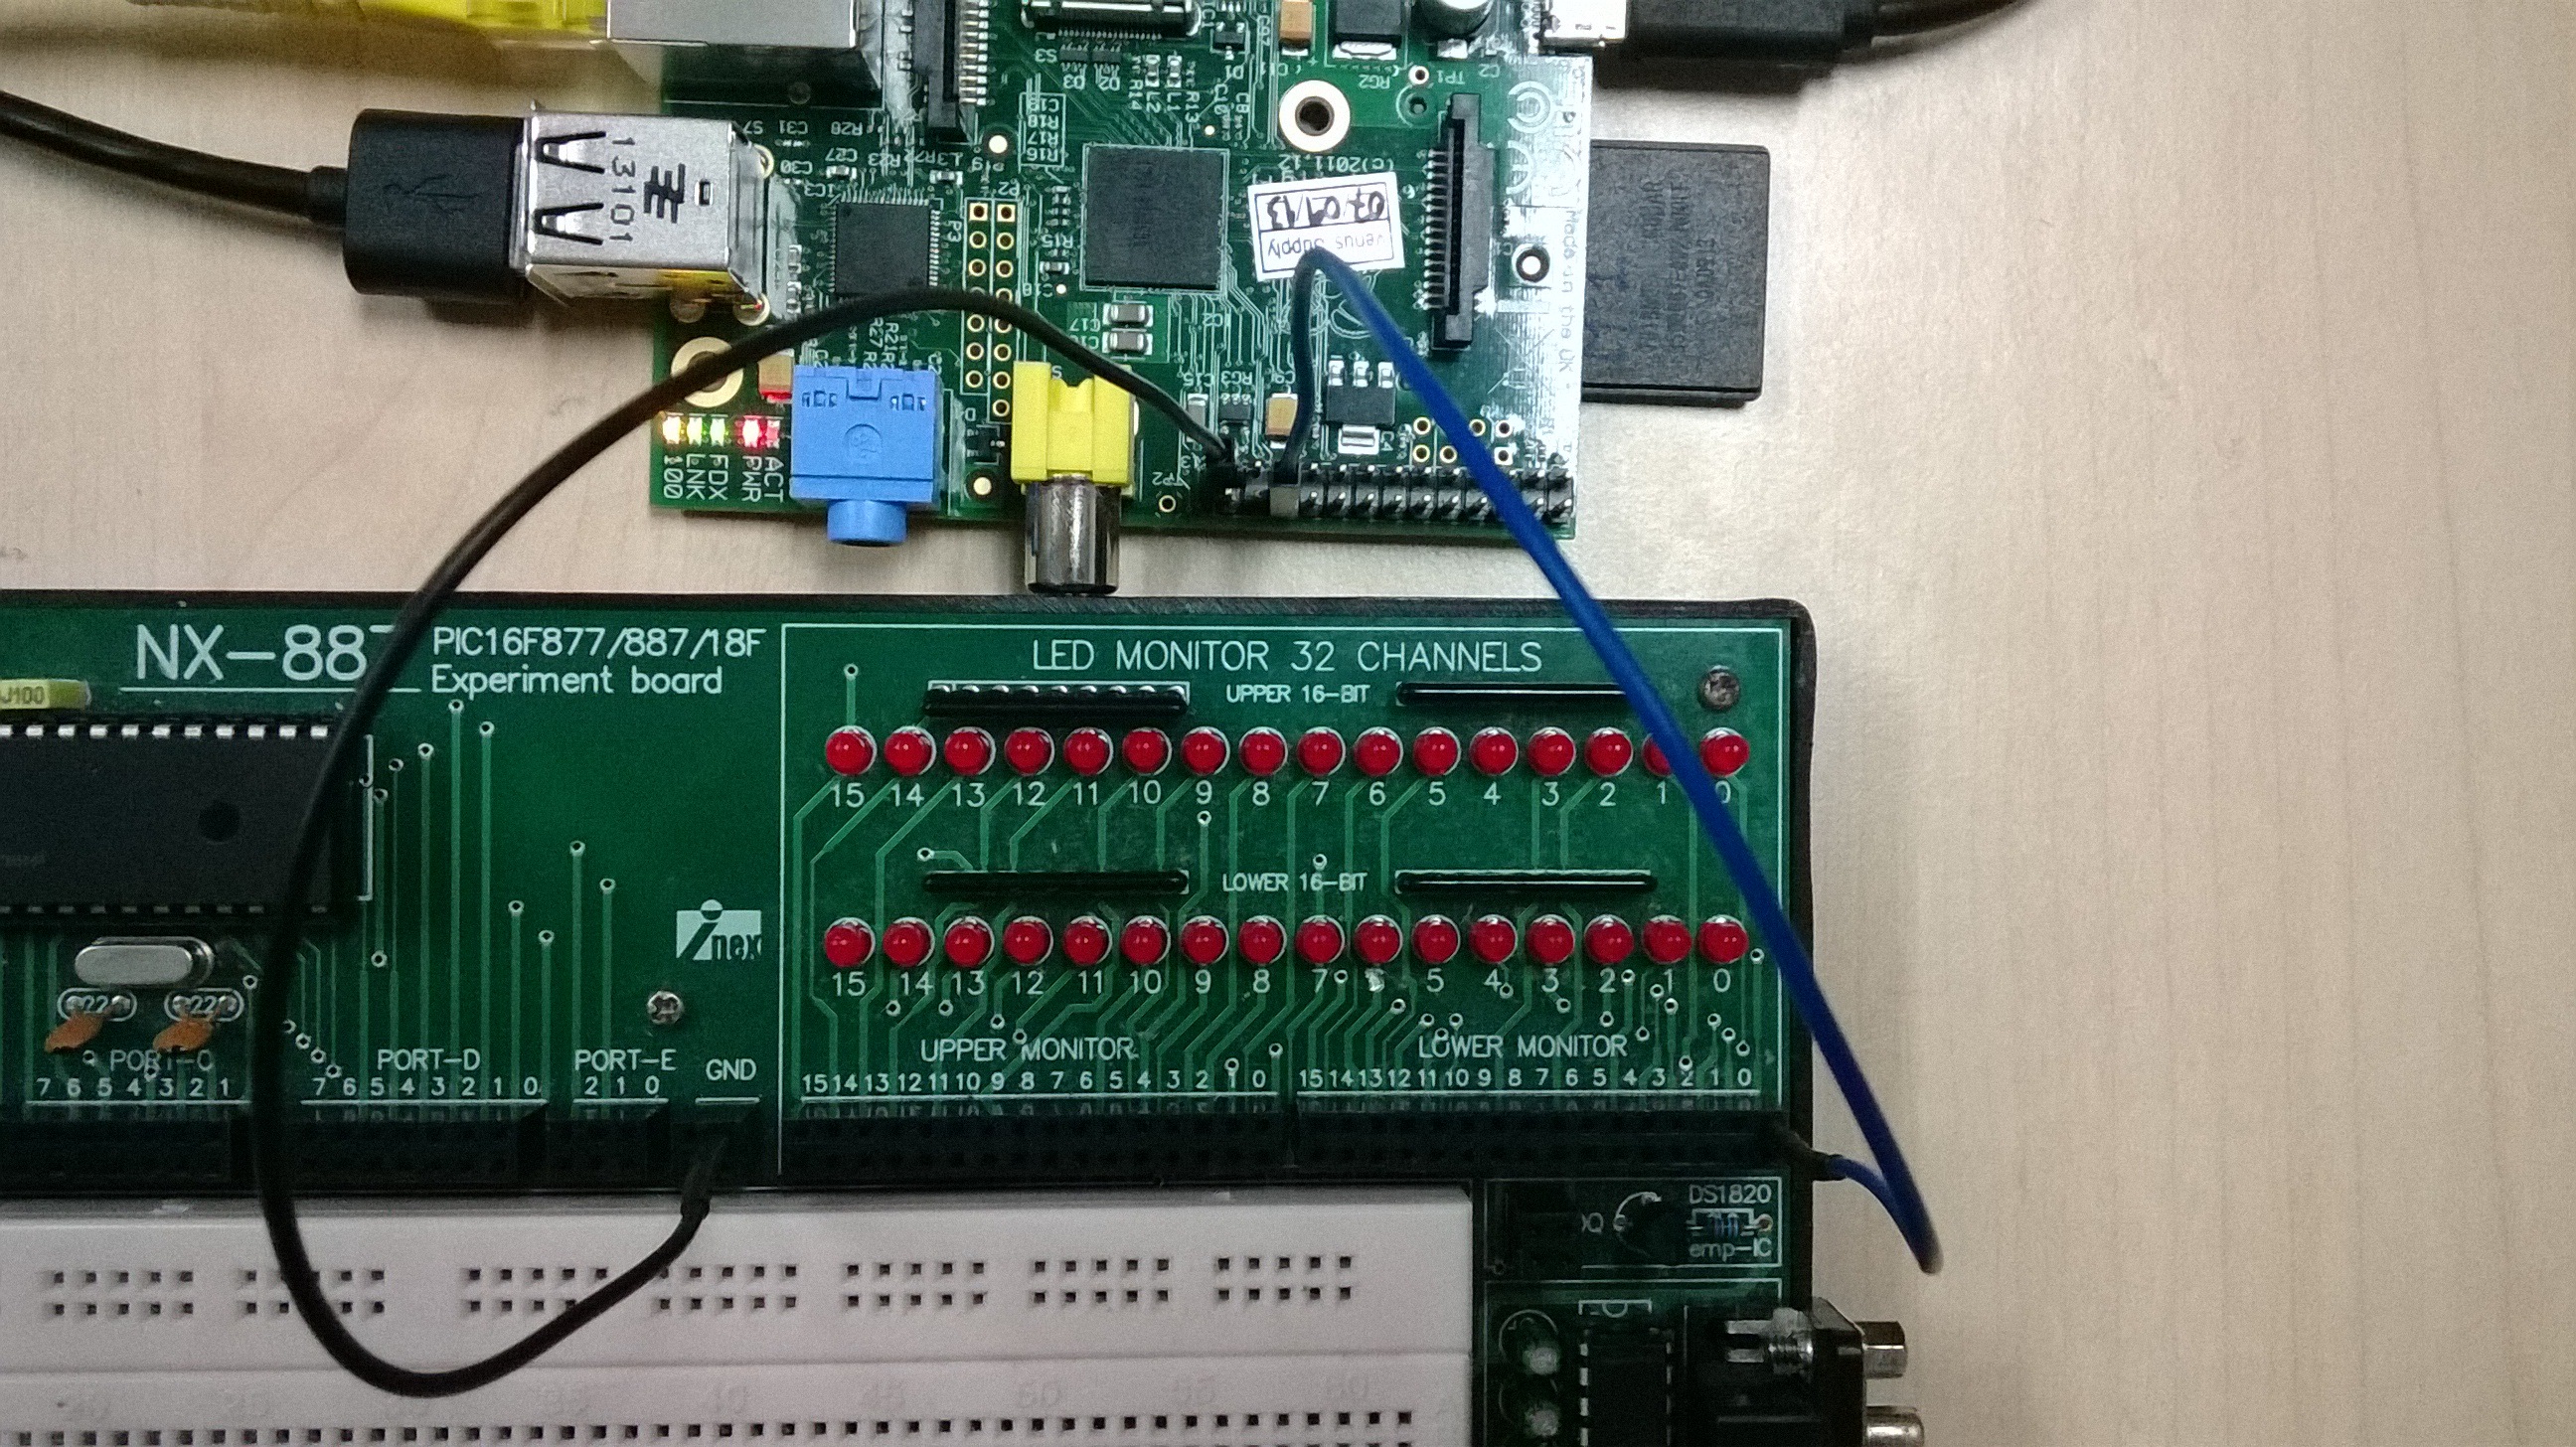
Connect PIN 25 (GROUND) of the Raspberry Pi to the GND of the experiment board.
Connect PIN 22 of the Raspberry Pi to LED 0 of the Lower Monitor on the experiment board.
This program shows how to turn on and off LED 0 remotely using the Web Server (file example 4.1 and video).
from webob import Request, Response
import RPi.GPIO as GPIO # Import library for GPIO (pin) access
GPIO.setmode(GPIO.BOARD) # Specify that we use the BOARD numbers (pin numbers 1-26 on the connector)
GPIO.setwarnings(False) # Disable the warning “This channel is already in use”
GPIO.setup(22, GPIO.OUT) # Configure pin 22 as an output
GPIO.output(22, 0) # Turn off the LED when the program starts
class WebApp(object):
def __call__(self, environ, start_response):
# capture the request coming from the browser
req = Request(environ)
print(“**** Serving request ****”)
# Look for on_off_variable in the request:
x = req.params.get(‘on_off_variable’) # save content of on_off_variable in x
print(x)
if x == “on”: # if button ON pressed…
GPIO.output(22, 1) # turn on LED
elif x == “off”: # if button OFF pressed…
GPIO.output(22, 0) # turn off LED
html = “””
Turn on or off the led:
<form method=”get”>
<button type=”submit” name=”on_off_variable” value=”on”>ON</button>
<button type=”submit” name=”on_off_variable” value=”off”>OFF</button>
</form>
“””
# create and return the response to the browser
resp = Response(html)
return resp(environ, start_response)
application = WebApp()
# main program – the web server
if __name__ == ‘__main__’:
from wsgiref.simple_server import make_server
port = 8080
httpd = make_server(”, port, application)
print(‘Serving HTTP on port %s…’%port)
httpd.serve_forever()
Assignment 4.A
Connect also LED 2 and LED 1 to pins 26 and 24 respectively (picture). Modify the previous assignment adding four more buttons in order to control LED 2, LED 1 and LED 0 as shown in this video.
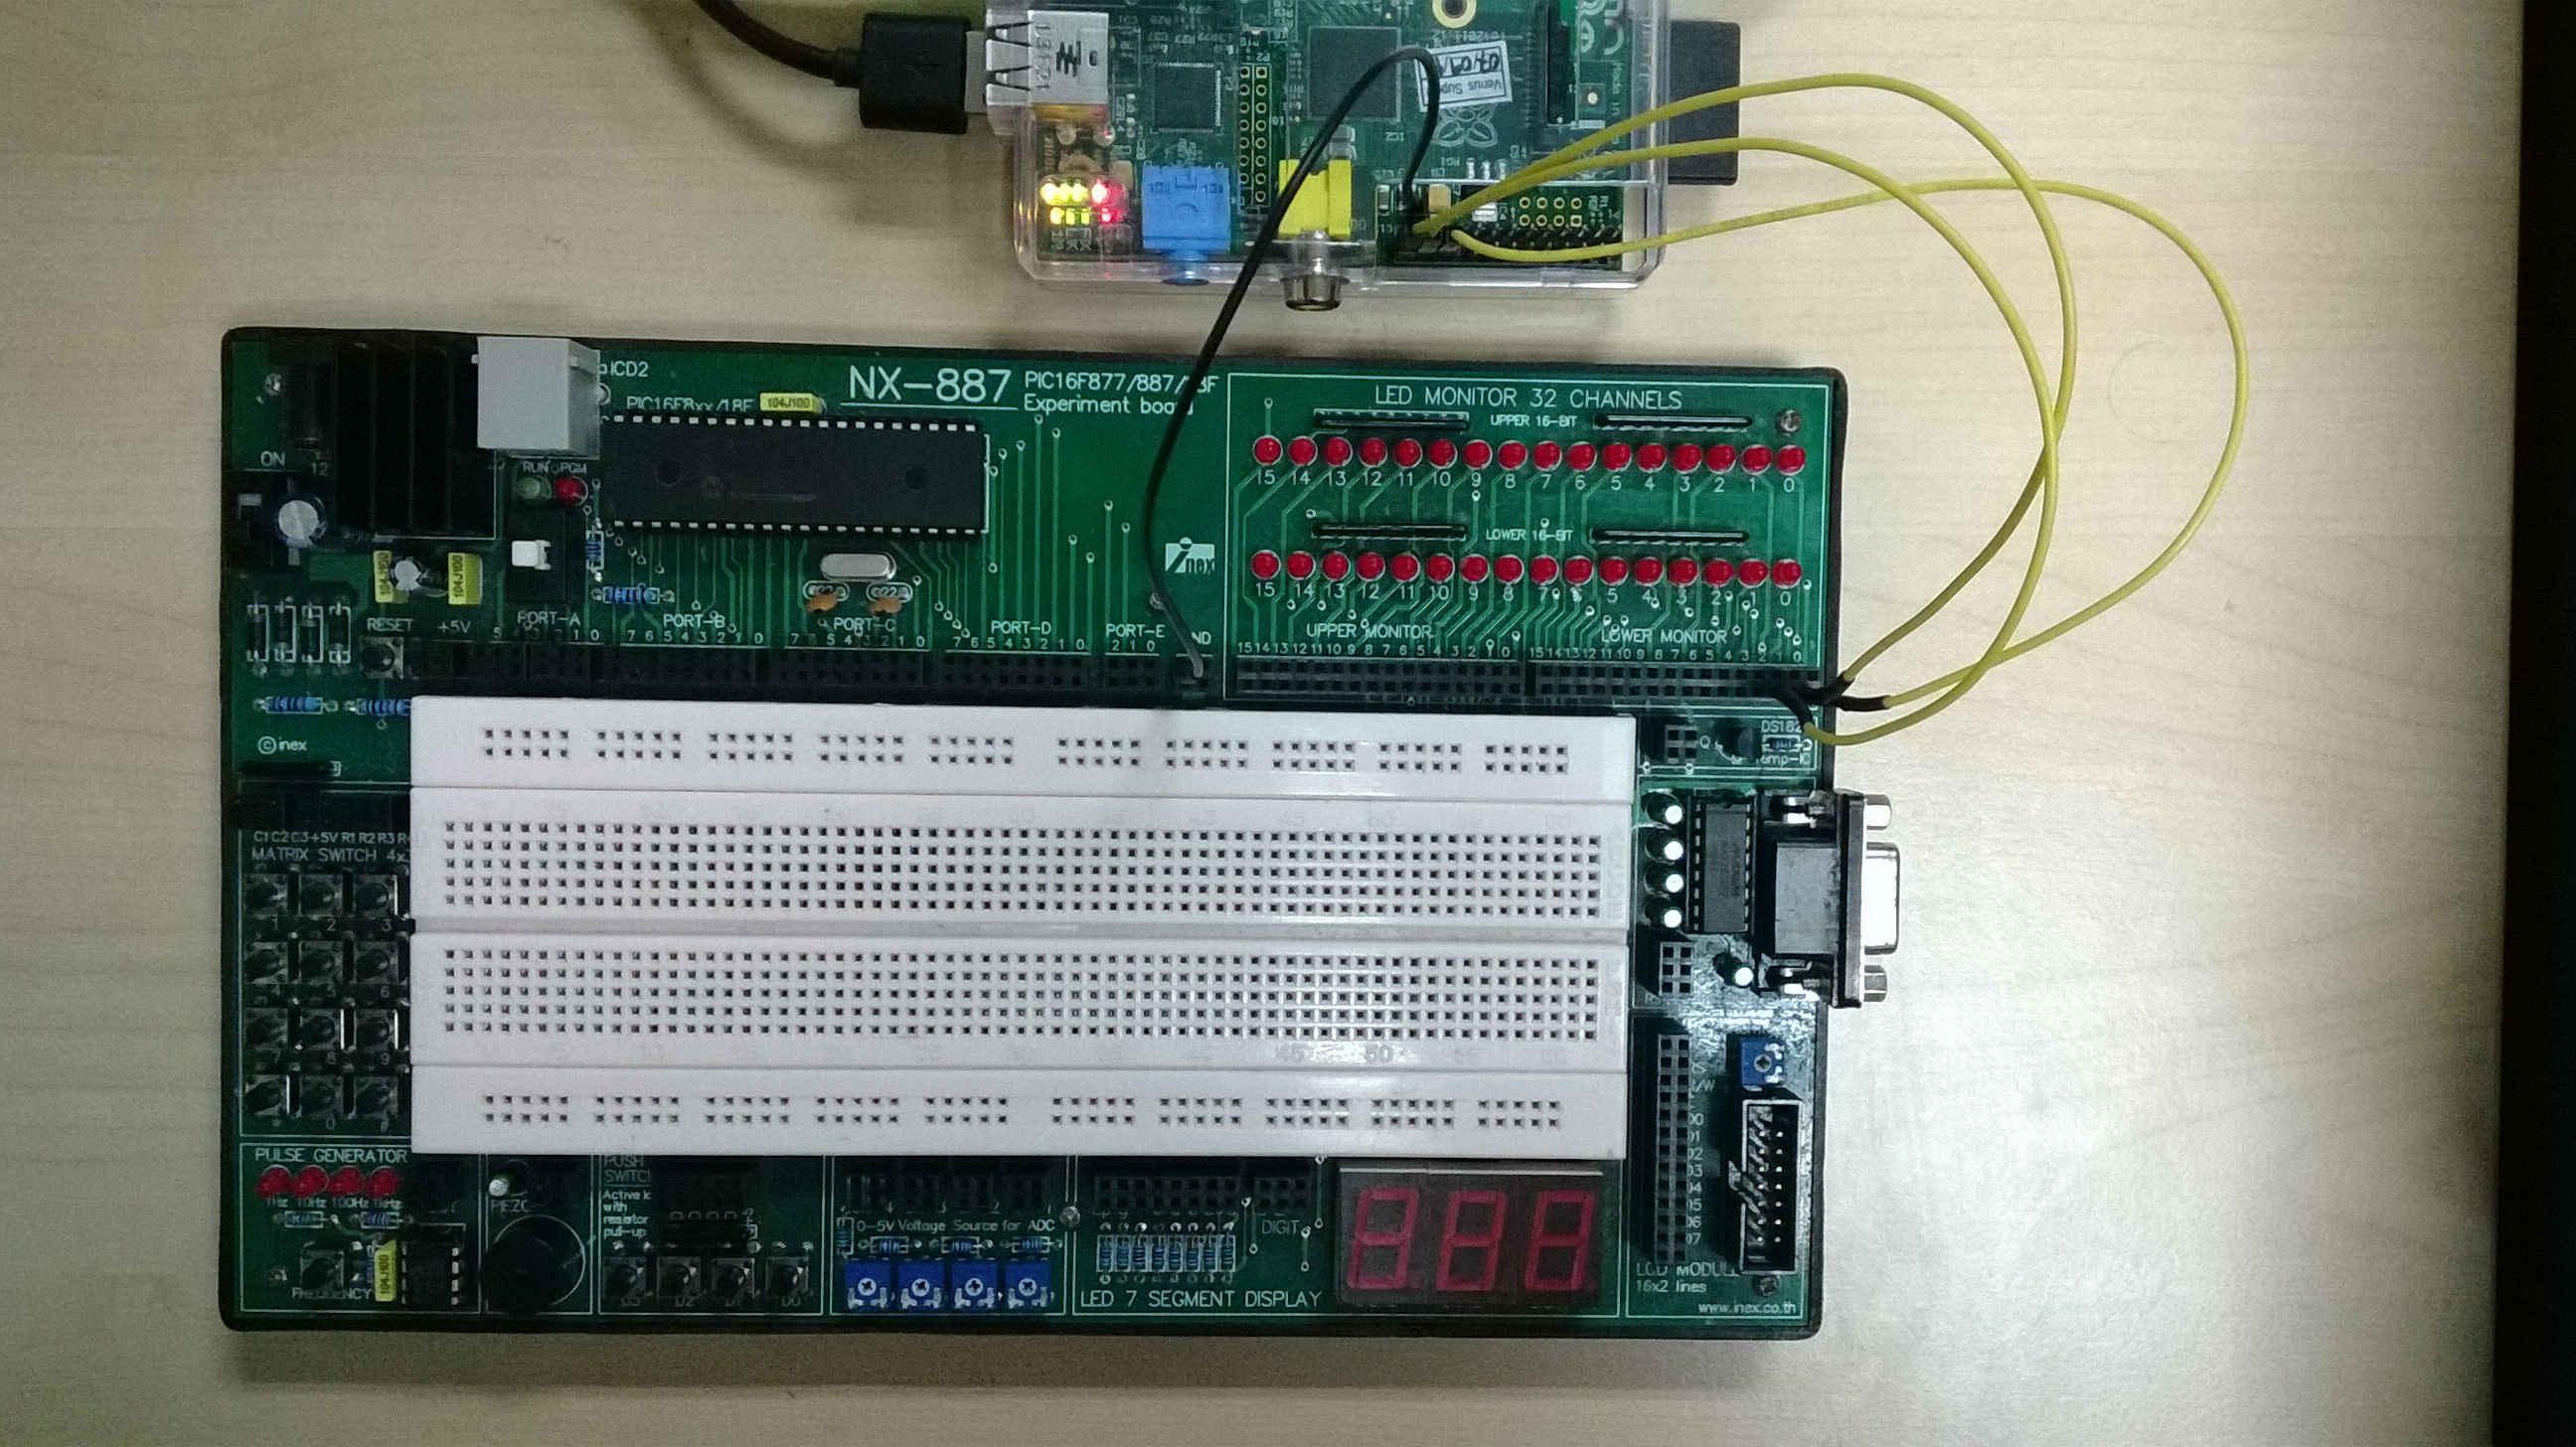