There are many methods that you can connect remotely to your raspberry pi (sometimes called headless connection)
What you need?
–Hardware:
1. Your raspberry pi
2. SD card
3. WiFi adapter (not necessary)
4. Ethernet connection
–Software:
1. Putty (putty.org)
2. real VNC viewer (https://www.realvnc.com/download/viewer/)
For your first setting up with your new Pi, do not forget to enlarge the file system and update and also upgrade your OS and software packets by using the following commands:
– sudo raspi-config (then select option 1 onthe software configuration windows and click finish to restart)
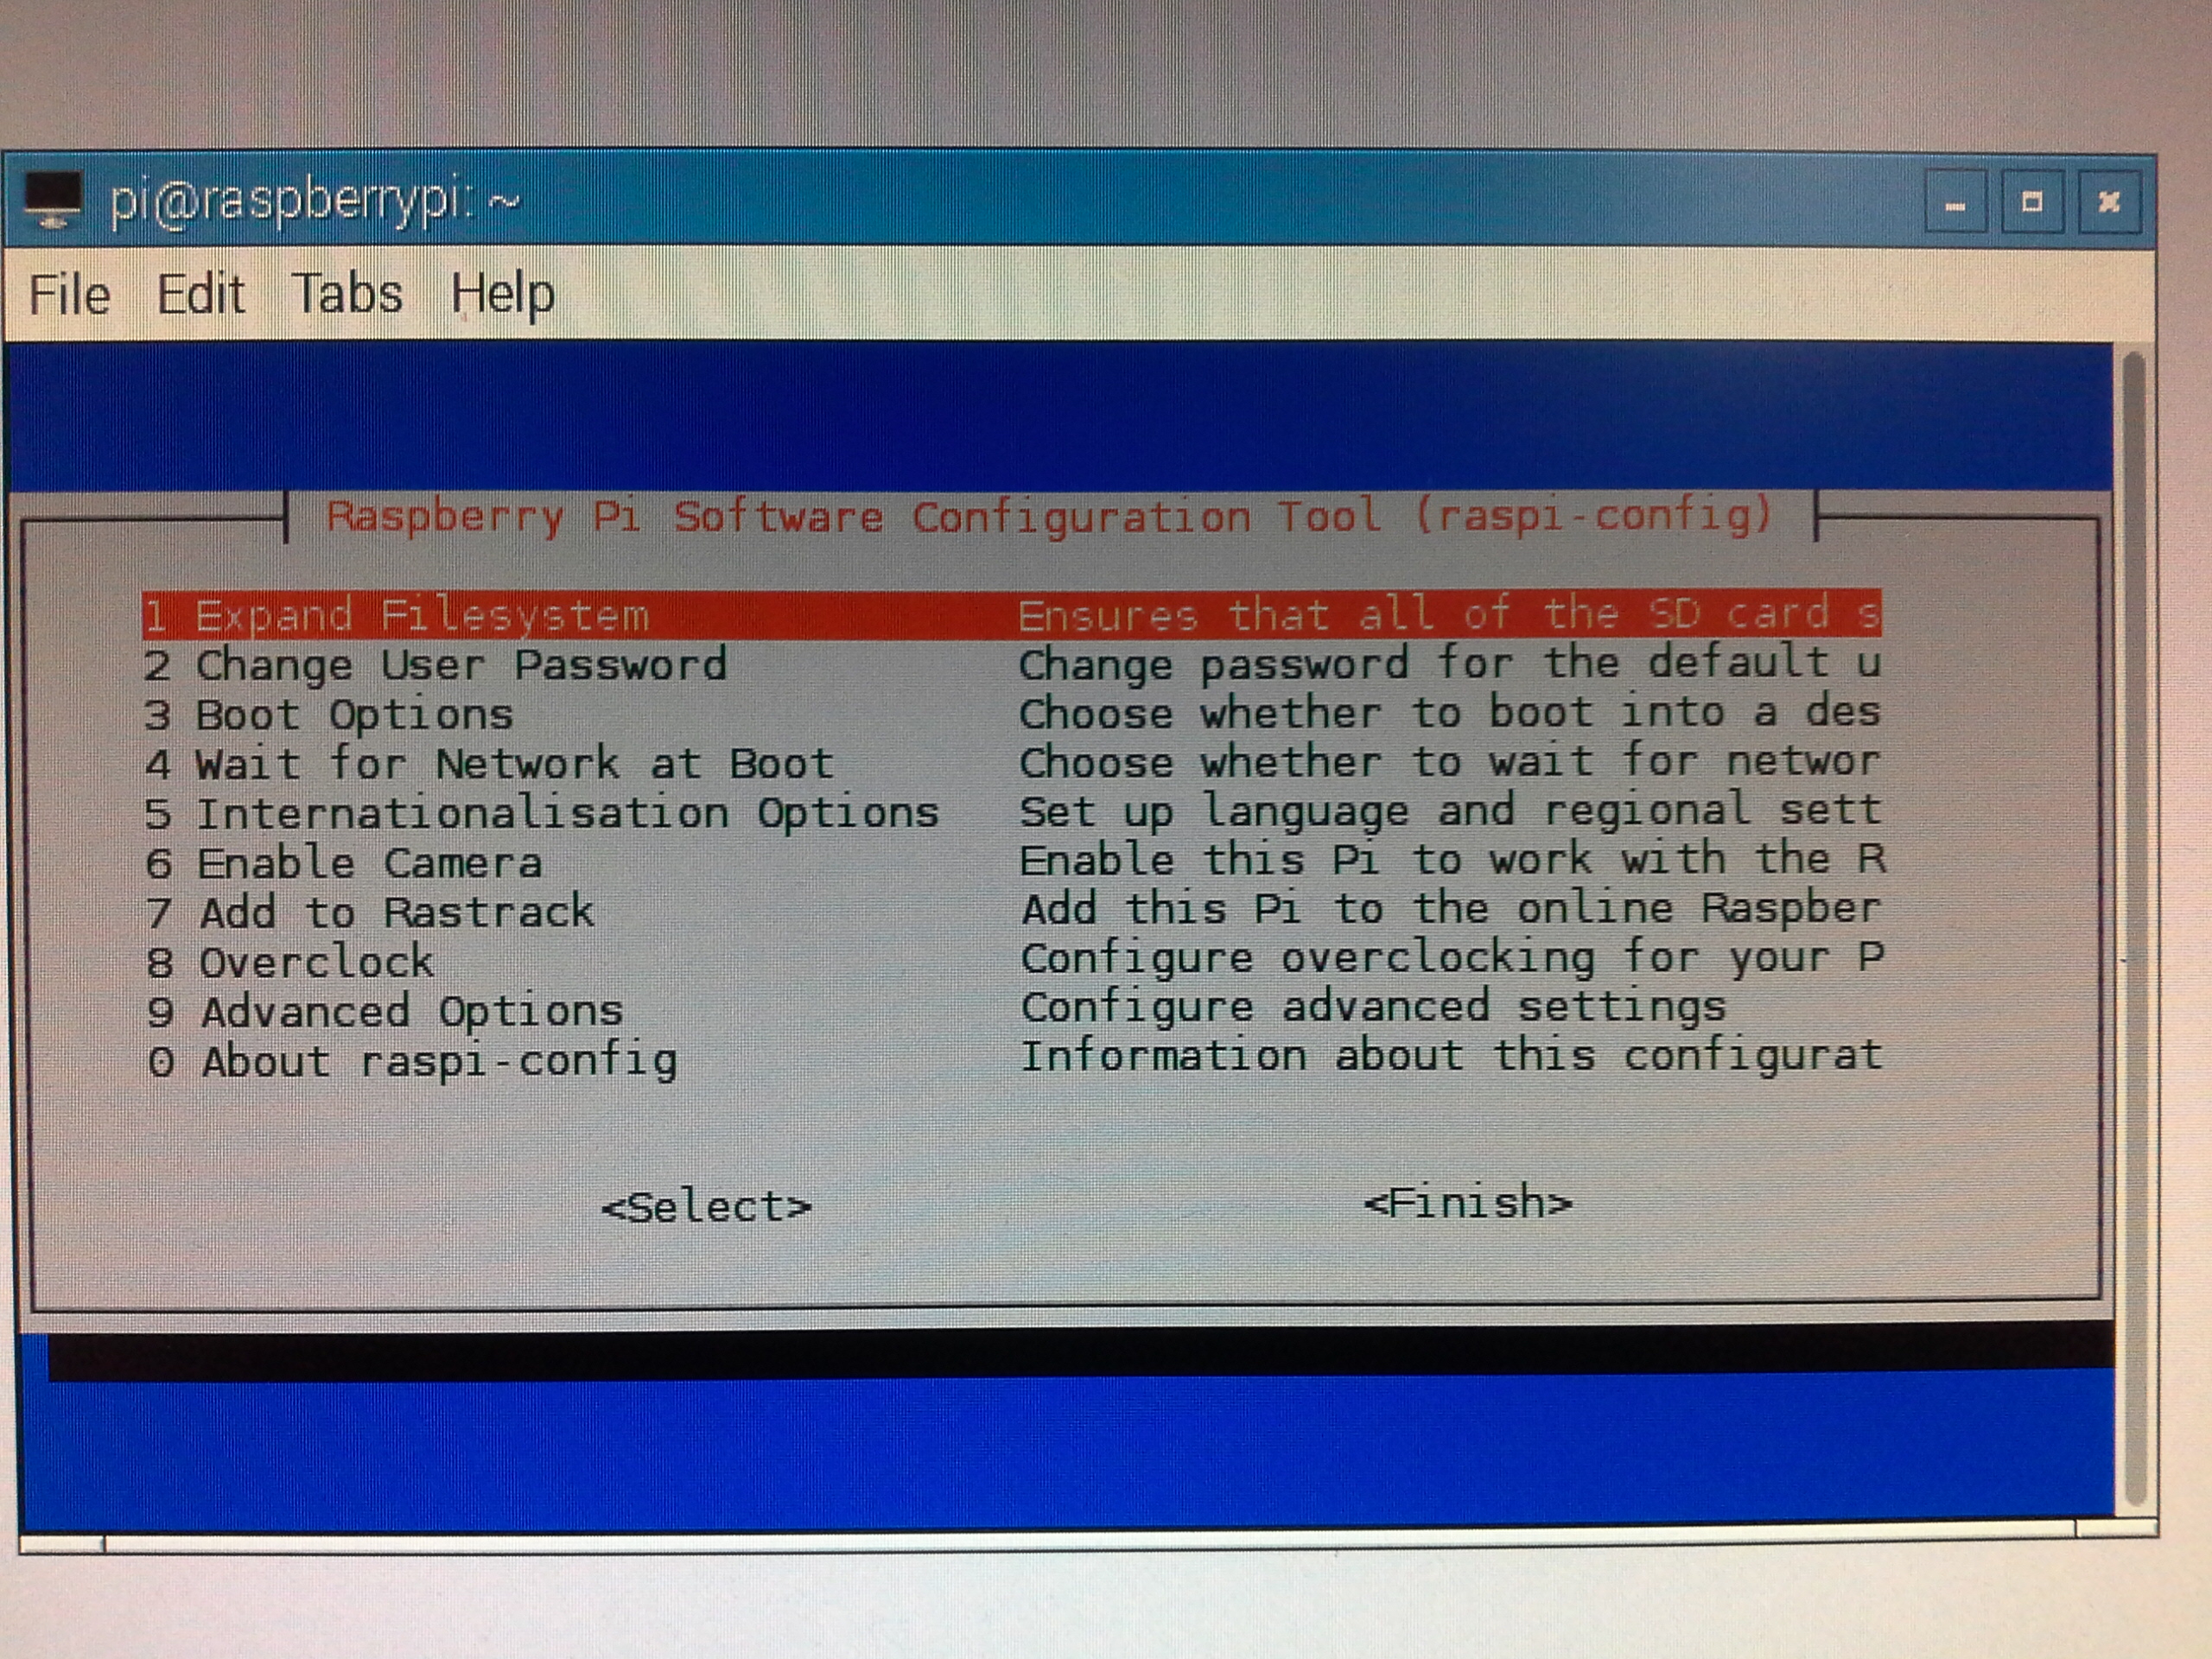

Then select “VNC”, to enable VNC:

– sudo apt-get update (to update)
– sudo apt-get upgrade (to upgrade)
Now reboot the Pi with sudo reboot.
###If there is an error messages, please restart your Pi after updating or upgrading and try again###
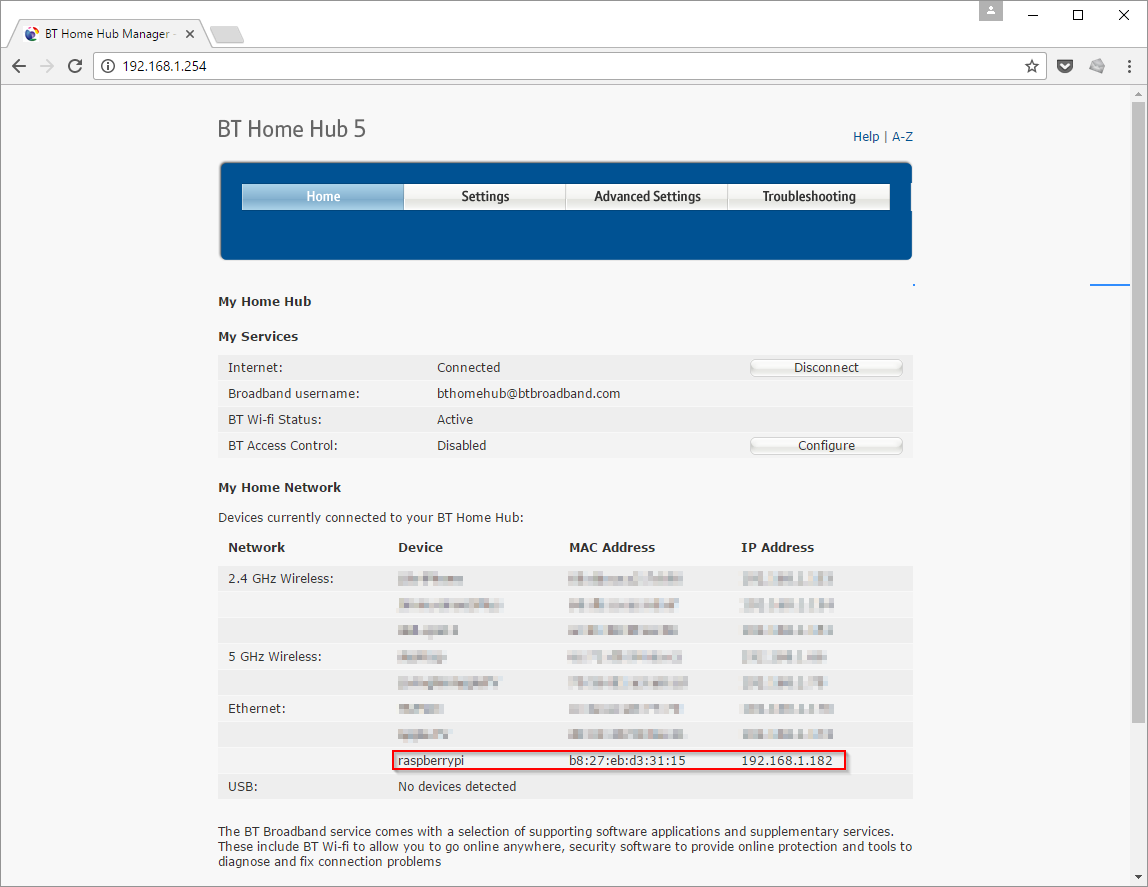
The important thing to know in order to remotely connect to your pi is ” your Pi’s IP address”
- Using IP address scanner
- Finding from your Router’s DHCP lease allocation table:
#another option: to share the internet from your PC with Pi
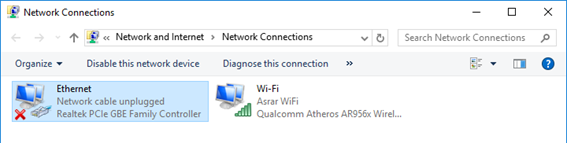
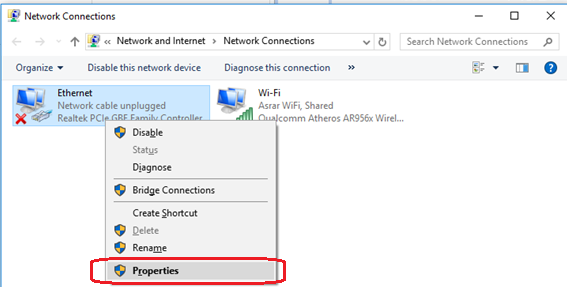
Open up the Network and Sharing Center settings and navigate to Change Adapter Setting
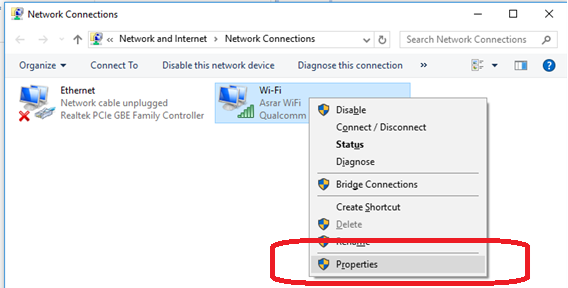
Right click on the Wireless Adapter and hit Properties
Navigate to the Sharing Tab and select the Allow other network users to connect through this computer’s Internet connection checkbox

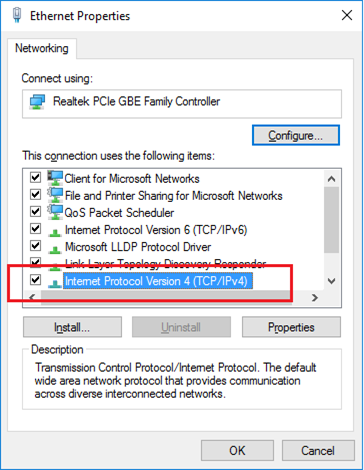
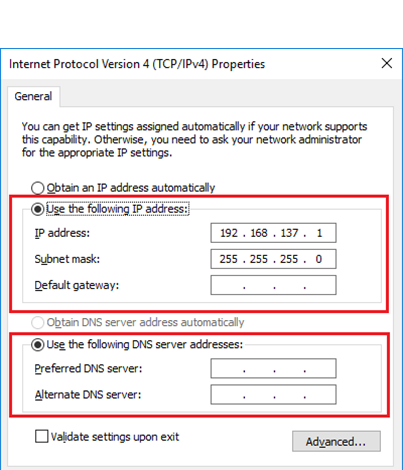
Now right click the LAN Adapter and hit Properties. Double click the IPV4 option and verify that some dynamic IP is populated (192.168.137.1 in my example)
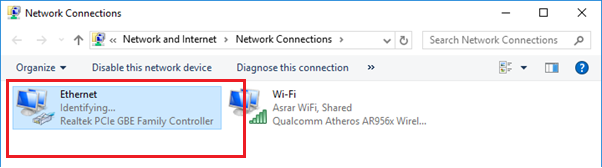
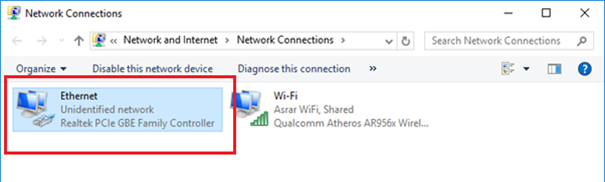
Now Power ON the Raspberry Pi (ignore if already powered ON :P) and connect one end of the LAN Cable to the Raspberry Pi and the other end to the PC. You should be able to see status messages Identifying… and eventually Unidentified network
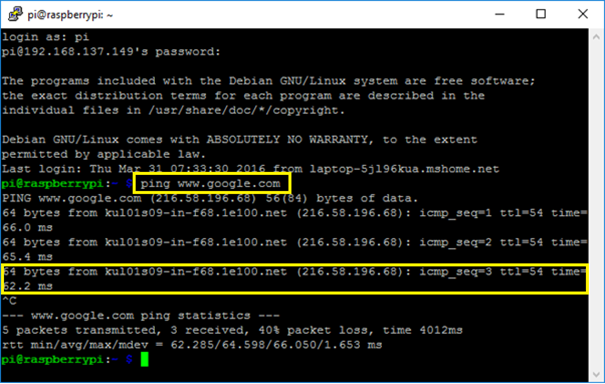
Open up cmd prompt and type in:

You should be able to ping the Raspberry Pi:
at raspberrypi.mshome.net

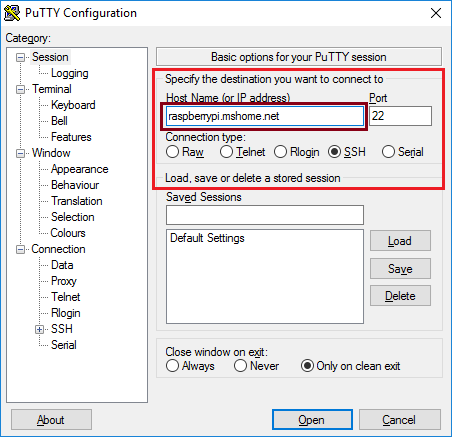
Open up Putty and set the Host Name as: raspberrypi.mshome.net and hit connect. (You can also use the IP address of the Pi revealed in the above ping prompt: 192.168.137.149)
You should be able to see the login prompt. Hit pi and raspberry and Enter

You can now

(or any other website) from within the Shell and you’ll have response messages. Congratulations! Your Pi now is connected to the World Wide Web ?
-Next, if you want to see the GUI (graphic user interface) on your PC windows, you may need to install the VNC client on your PC and install the VNC server on your Pi.
To install the VNC server, type the following command at the command line window
–sudo apt-get install tightvncserver
## you may need to confirm your installation by typing “y” to proceed##
-Next, install another tool call “xrdp” for the Desktop remote connection of windows
To install the “xrdp” at the command line window
–sudo apt-get install xrdp
-Next, start the VNC server
-at the command line type in
–vncserver :1 (to start server no. 1)
-put your desired password and retype your password again
password: raspberry
verify: raspberry
###Be careful to key in your password correctly because you can not see what you are typing on the screen###
If there is a message asked “if you like to enter a view-only password (y/n)?” select “n”
- After making a connection with “PUTTY”
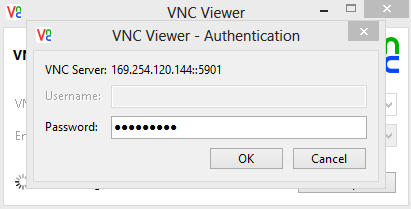
- Download VNC viewer software to your PC and Run the application
key in the ip address and following by colon and the server no. which is “1” and click connect
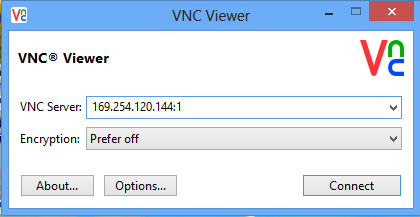
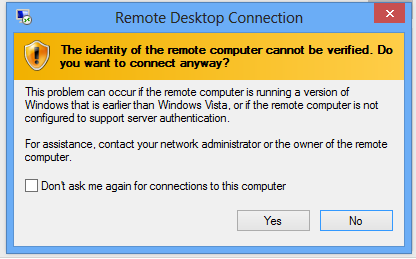
-Click yes, if you see the warning

Key in the password for the server, which is “raspberry” for this case and click “ok” to connect.
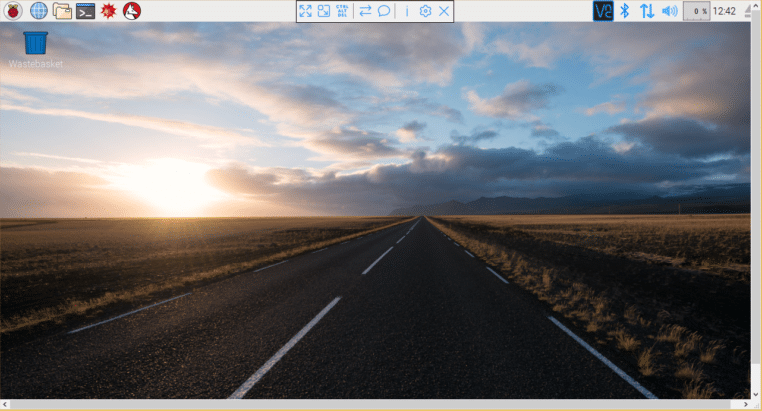
Then you should see the Pi GUI on your PC
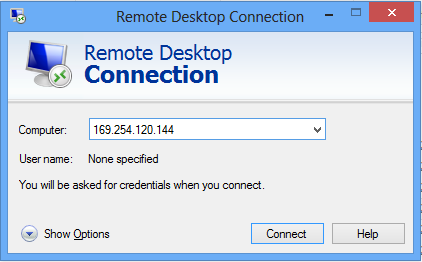
Another option is using Remote Desktop Connection from window
Then type in the username and password (pi and raspberry) and click “ok”
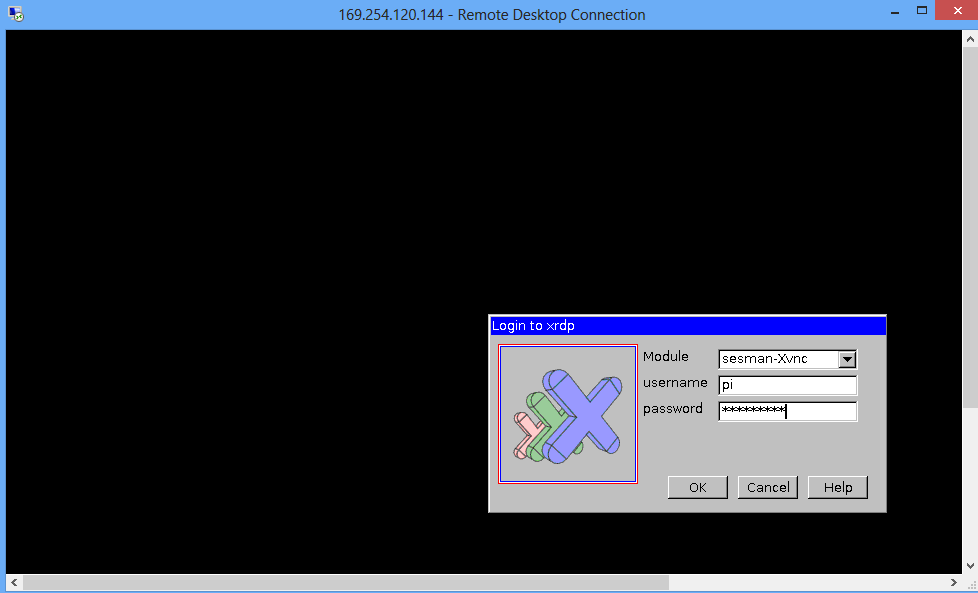
Then you should see the GUI of your Pi 🙂